Custom PC Build
Sep 12, 2021 | Author: Nic La | Tags: project computerPre pandemic and fortuitous timing, I decided to upgrade my home PC setup. I had been using an old laptop like a desktop and was quickly running out of storage. This also seemed like a good time to switch from game console to PC gaming. So it was decided, I needed a badass gaming desktop that would last me the next 10 years.
Research
Budget:
Start with a budget. $2000 says I want the low-end of high-end PCs. This is also a good starting point for future expansion. Because you have plans to expand you can save money by spec'ing the minimum quantity of hardware that can be expanded upon, e.g. RAM and storage. Below are the essentials that comprise a PC. To spec' the appropriate parts, there's some basic questions to answer first.
- Case
- Motherboard
- CPU
- CPU cooling
- GPU
- Storage
- RAM
- PSU
- OS
Windows or Mac OS or Linux?
Which OS to use? This was an easy one. Windows is the only way to go if you're serious about gaming. The games I'm interested in are not provided on Mac OS or Linux. Additionally, Windows is popular in the professional world. No reason to mix things up in my less professional life.
AMD or Intel?
I wanted the best so I compared the 10th Gen Intel Core i9 10900K against the AMD Ryzen 9 3900X. While comparable, AMD scores higher. Rumors were that Intel had been struggling with heat management and AMD didn't have this problem.
NVIDIA GeForce or AMD Radeon?
Finding the right GPU is all about satisfying your graphics requirements for the lowest price. Naturally, AMD is going to cost less compared to its NVIDIA performance counterpart. That said, after a certain price point, NVIDIA surpases AMD in performace.
According to Toms Hardware GPU Hierarchy, given the same price point, Nvidia GeForce RTX 2060 Super scores 64.4% while AMD Radeon RX 5700 XT scores 72.3%. For $98 more, Nvidia GeForce RTX 2070 Super scores 75.8%. For $294 more, Nvidia GeForce RTX 2080 Super scores 85.1%. Accordig to Toms Hardware Best GPUs, AMD Radeon RX 5700 XT is ranked 3rd best under Nvidia GeForce RTX 2080 Super. According to PC World Best Graphics Cards for PC Gaming, AMD Radeon RX 5700 XT is designed for 1440p gaming at higher than 60fps. According to Toms Hardware GPU Buying Guide, AMD Radeon RX 5700 XT is considered high-end. Given all this research, AMD Radeon RX 5700 XT would have been perfectly adequate for my monitor and gaming expectations. Why not an all AMD build? Remember this PC needs to last 10 years. What if I decide to upgrade my monitor. Let's put in the extra $98 for the Nvidia GeForce RTX 2070 Super.
SSD or HDD?
This is hardly a decision. Of course SSD. Only the best SSD. If you're serious about gaming, which you are, one of the single greatest contributions you can make to performance is to switch from HDD to SSD. Don't skimp on quality here. Not only did I get SSD but I got M.2 SSD and not only did I get M.2 SSD but I got Samsung's Evo Plus M.2 SSD. All of this means faster read and write speeds. But wait! We don't want to over do the capacity here. We can always buy more storage later. 1TB should do just fine for now.
How much RAM?
Rather, how much RAM do I need starting out? You can always add more RAM later. 16 GB is a respectable number. 32 GB is the goal. Again, pay a little extra for those faster read and write speeds (Memory Clock Speed). You cannot mix RAM Memory Clock Speeds.
Custom Liquid Cooling or Commercial Liquid Cooling or Fan?
There's definitely a hierarchy here. From most desirable to least: custom liquid cooling, commercial liquid cooling, fan. Unfortunately, that is also the order of most expensive to least. Custom will typically cost in the order of $600 more than commercial. Custom or commercial, liquid cooling is going to be quieter than fan. When talking about PC cooling, certain devices take priority, i.e. CPU and GPU. Commercially available liquid cooling exists for a wide range of CPUs. However, liquid cooling a GPU usually requires a high-end GPU and a custom liquid cooling rig. Fan, don't bother.
Pre-Built or Custom?
A friend had just gotten a good deal on an Alienware Aurora R11. Alienware is solid but I like more control over my builds. Alienware lacks greater customization of components like motherboard and storage. NZXT has their own PC builder where everything has a part number, no vague components. You can actually spec' and purchase all the parts individually, build the PC yourself and save ~$100. I, knowing little about custom PCs, wanted NZXT to build it for me. I waited. I watched. Parts came and parts went. Prices came and prices went. Never did I see the combination of parts and price that would be my PC. I decided to build it myself.
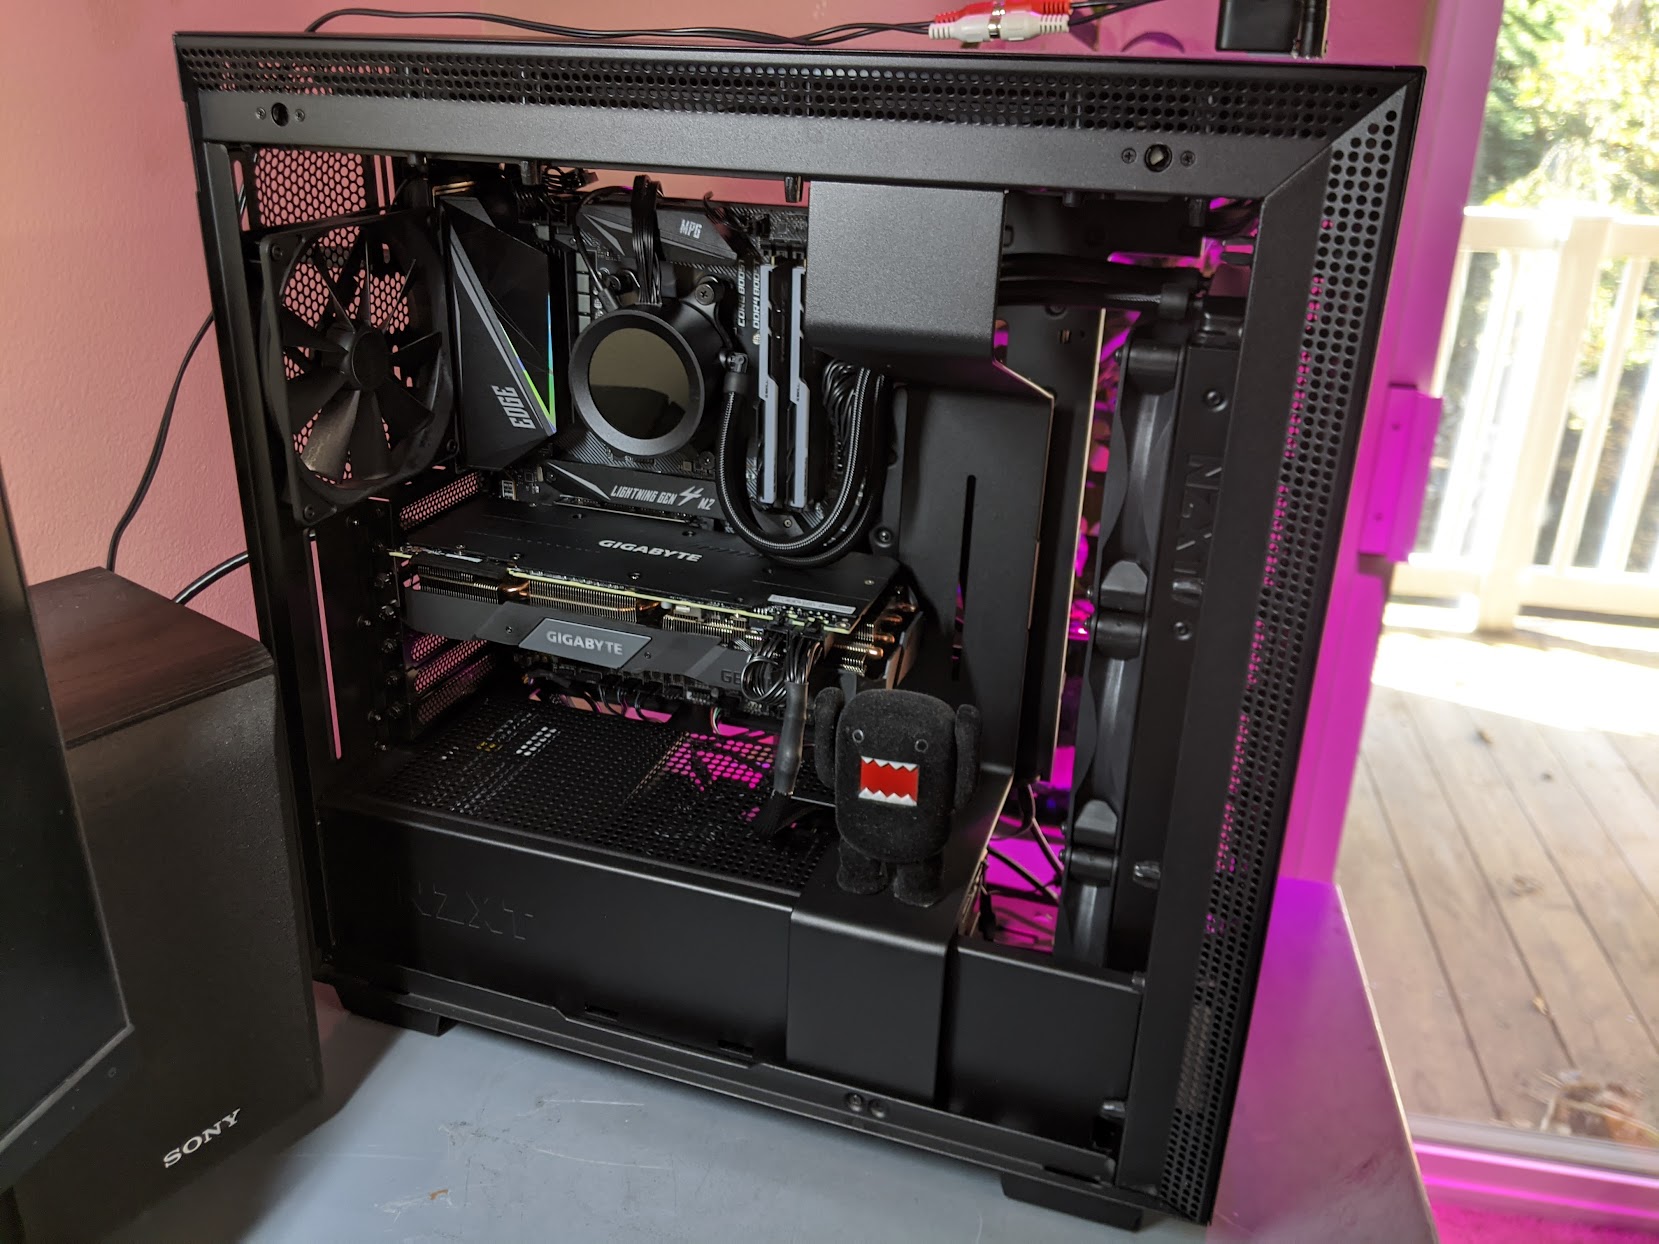
Parts List
Given the above, the below is what I settled on.
- Case: NZXT H710 - $137
- Motherboard: MSI MPG X570 GAMING EDGE WIFI - $210
- CPU: AMD Ryzen 9 3900X 12-Core 3.8GHz - $421
- CPU cooling: NZXT Kraken Z73 with LCD display - $270
- GPU: Gigabyte GeForce RTX 2070 Super - $550
- Storage: Samsung 970 EVO Plus - $190
- RAM: G.SKILL TridentZ RGB Series 16GB - $118
- PSU: NZXT C850 - $120
- OS: Microsoft Windows 10 Pro - $150
- Figurine: Domo
Build It
Taking notes, I watched several PC build videos.
- I Built an NZXT Gaming PC!
- How To Build a PC - Newegg's Step-By-Step Building Guide
- $3000 Gaming PC Build - i9 9900K RTX 2080 Ti (w/ Benchmarks)
- $1500 Gaming PC Build Guide - RTX 2070 i5 9600K (w/ Benchmarks)
A pattern began to form. From that pattern, I created build instructions specific to my PC.
- Clear off a clean work surface. I recommend a desk.
- Install the CPU in the motherboard. Align the CPU triangle with the marked corner.
- Install the RAM in the motherboard. Reference the motherboard manual to determine the proper arrangement.
- Install the SSD in a M.2 slot. I recommend the slot with the heat sink. Don't misplace that M.2 screw.
- Place the case on its side. Install the motherboard. The motherboard has a built-in IO shield. Without the IO shield dust can get in. The case has built-in motherboard standoffs. Without the standoffs, the motherboard might short against the case.
- Move the case to its feet.
- Install the Kraken. I installed the Kraken fans in front. You want air to flow in through the front and out the back and top. The front of a fan is identifed by the open side. The back is identified by crossbars. Remove the front fans that came with the case. Mount the Kraken fans to the radiator. Remove the cable shroud from the case to mount the Kraken. Install the Kraken heat sink on the CPU. The Kraken heat sink comes with thermal paste already applied. Note the orientation of the LCD. Wires at the 12 o'clock is up. If mounted in a different position, the animation can be rotated. Wire the Kraken fans and LCD. Don't forget to remove the sticker on the LCD.
- Install the fans, removed from the front earlier, in the case top. As a reminder, air should flow from the front and out the back and top. Wire the top fans.
- Continue wiring. Wire the case to the motherboard.
- Install the PSU. Attach only relevant cables. Mount the faceplate to the PSU. Insert the PSU and wire.
- Install the GPU. Pick a PCIe slot. Top looks nicer. Remove the second and third expansion slots from the back of the case. Mount the GPU and wire.
- Finishing touches. Install the figurine. I found a Domo that matched my style. You need to pick something that matches your own style. Funko Pops are popular.
- Return the case panels, front and back. Install the bluetooth and wifi antennas.
- Connect a monitor, keyboard, mouse, etc. Power up the PC. It's alive! If it's not alive, fret not. Review the previous steps. Most likely, a step was omitted or executed incorrectly.
Optimize
- Install Windows 10 for free, if you're into that. Create a Deactivated Windows 10 USB Install. A Deactivated Windows 10 will have a little watermark in the bottom right corner. Additionally, a Deactivated Windows 10 will lack full customizability.
- Visit the motherboard's website and install the latest drivers.
- Audio
- LAN
- WLAN-BT
- RGB and fan control program (Dragon Center)
- Confirm RAM is running at the rated frequency.
- Boot into BIOS
- Advanced Mode > Ai Overclock Tuner > Extreme Memory Profile (XMP) = Profile1
- Install GPU drivers
- Download and install Nvidia Geforce Experience.
- Sign in. Expect auto download of latest driver upon sign in.
- Select Express Installation.
- Disable GPU RGB lights. Download RGB Fusion 2.0. Disable RGB lights. Confirm, after power cycle, RGB lights do not return.
- Download and install NZXT Cam program to control Kraken.
- Expand on hardware.
- Expand RAM. Buy more of the same
- Expand SSD. Buy more of the same
- Accessorize.
- Dell UltraSharp U3415W 34-Inch Curved LED-Lit Monitor - $700
- Logitech K780 Multi-Device Wireless Keyboard - $60
- Logitech MX Vertical Wireless Mouse - $94
- Xbox Wireless Controller - Black - $60
- Give your PC a name. Control Panel > System and Security > System > Change Settings.
- Keep it going