Morse Code Box
Dec 28, 2022 | Author: Nic La | Tags: project code microcontroller boxThe Morse Code Box is essentially glorified wrapping paper. It's a more thoughtful way at gifting a less thoughtful gift and it's perfect for the puzzle enthusiast or computer scientist. It presents the recipient with a challenge that, in the end, leaves them with a reward not a gift.
My friend and I have this anti-tradition tradition. We pass back and forth The Celebratory $100 Bill each birthday, in part, to stay in contact with each other but also to stray from tradition. We can never spend the bill so it's lost its innate value but gained a value you can't put a price on. In an attempt to make it more interesting we try presenting the bill in new and creative ways. The Morse Code Box is one of my new and creative ways.
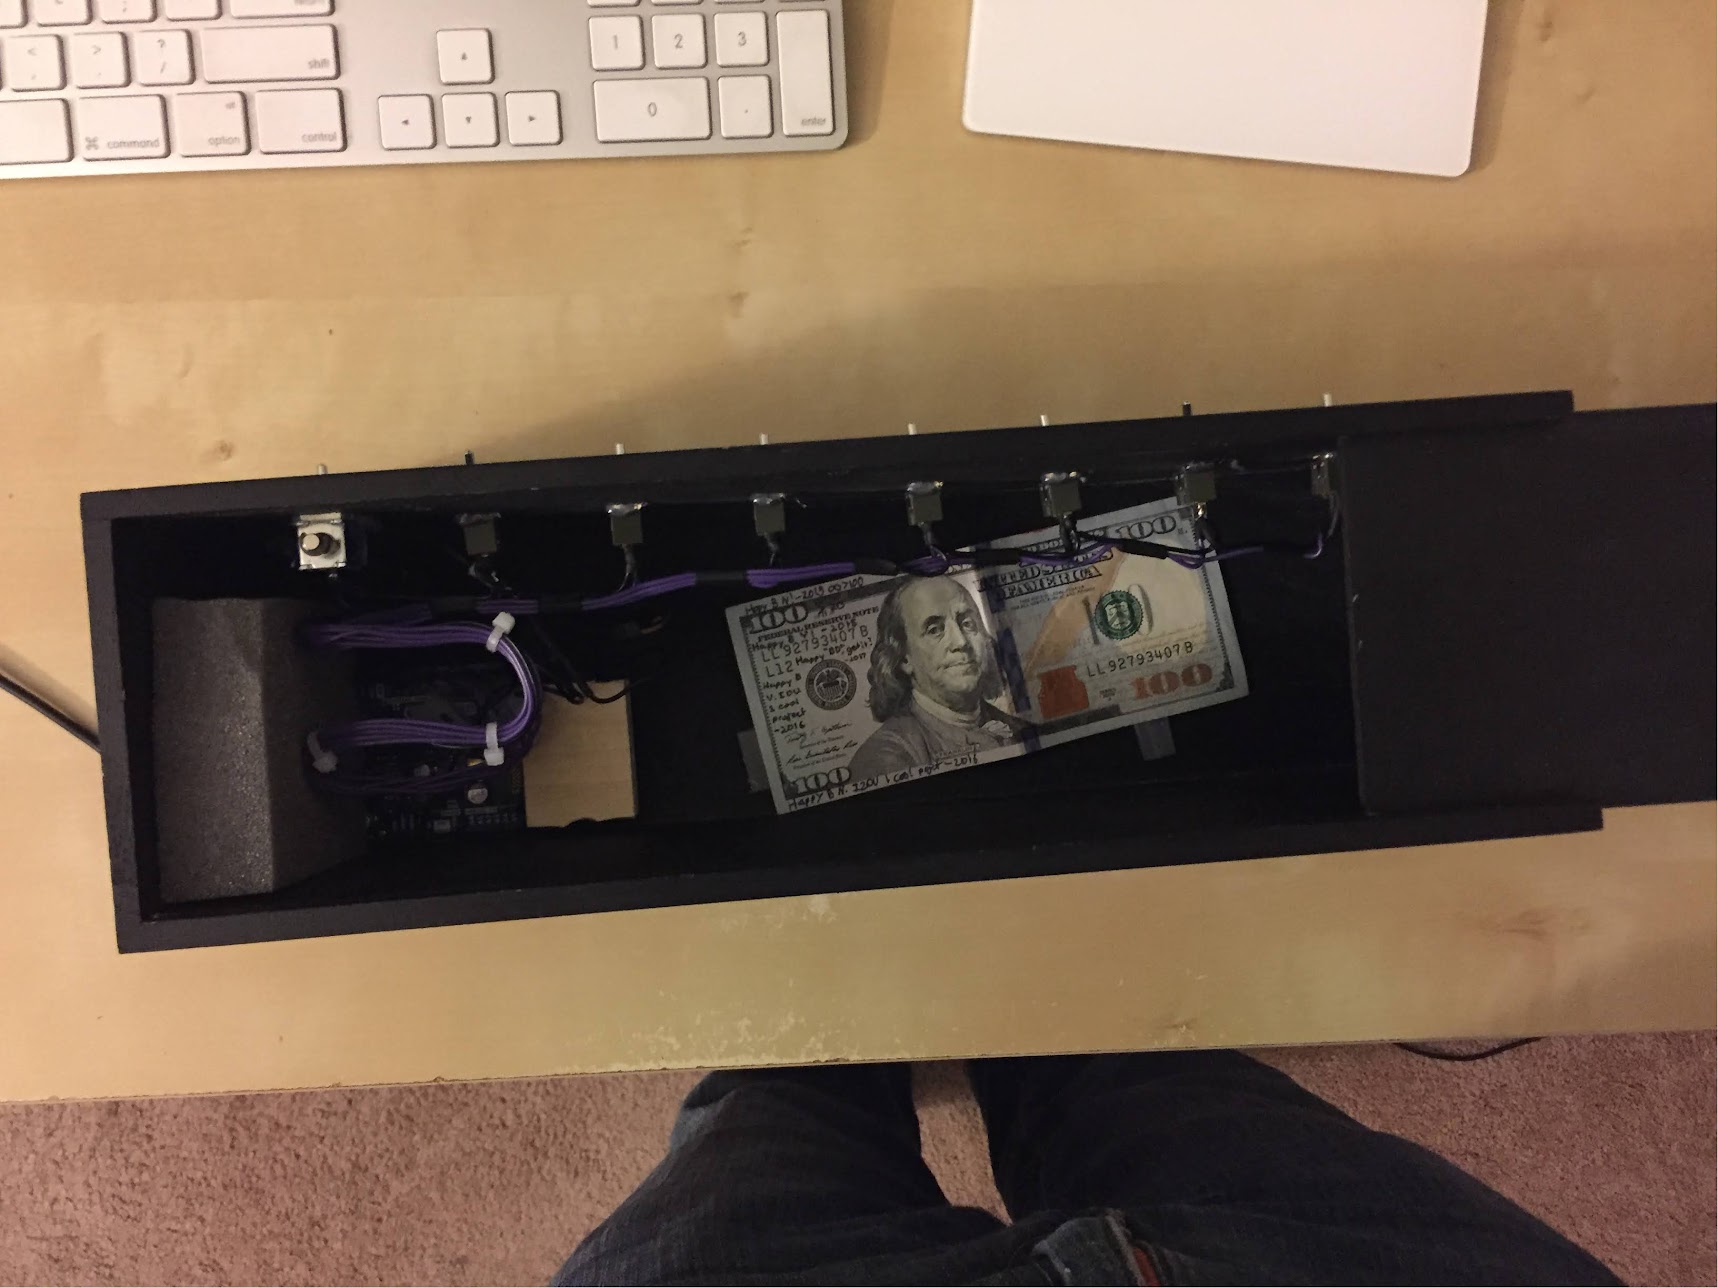
The Morse Code Box is made from a wine box with a sliding lid. In the OFF state, the lid is locked and doesn't slide back. Connecting the box to power puts it in the ON state and the Red LED begins to flash, only it's flashing at an inconsistent rate. This is the hint. The LED is flashing a message of your choosing in morse code. I used the message "HAPPY BD", "BD" of course meaning "birthday". My friend is a computer scientist so I thought he might appreciate how "BD" is also hex (I was wrong). Convert this to binary, 0xBD = 0b10111101, and that's 8 bits of 1s and 0s. There are 8 switches on our Morse Code Box labeled "1" for up and "0" for down. Entering the correct switch combination illuminates the Green LED and enables the solenoid for 10 seconds allowing the recipient to slide back the lid revealing their prize...an Arduino Zero. Those things aren't cheap.
Step 1: Materials + Tools
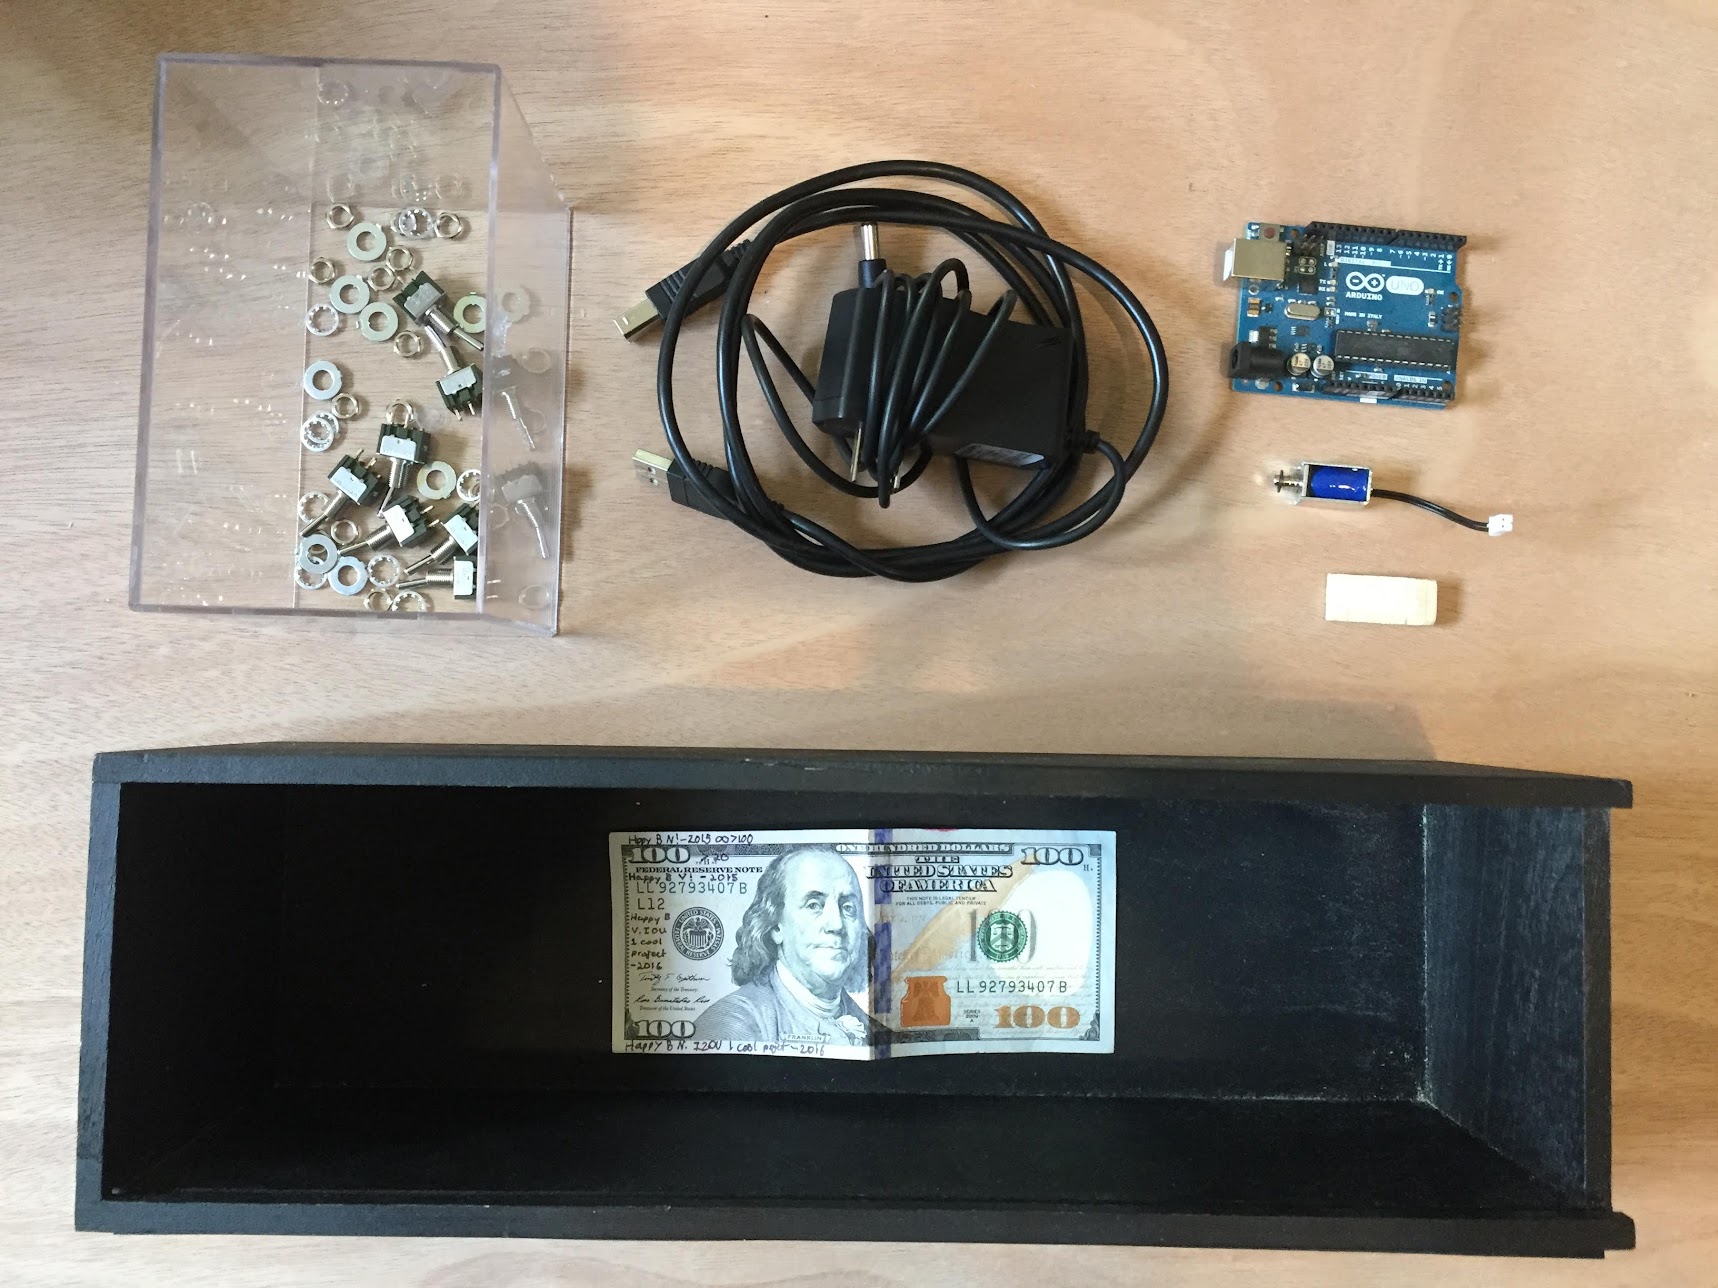
Materials:
- (x1) Twine Single Wooden Decorative Wine Box with Sliding Lid
- (x1) scrap of wood from your last wood project
- (x1) Arduino Zero (not Arduino Uno as in some pictures). We need the Arduino Zero for it's large number of interrupt ports.
- (x1) Arduino power supply. I used a 9V center-pin-positive power adapter.
- (x8) SWITCH TOGGLE SPST 6A 125V
- (x1) Mini Push-Pull Solenoid - 5V
- (x1) TIP120 Power Darlington Transistors
- (x2) 220 Ohm Resistor
- (x1) 2.2 kOhm Resistor
- (x1) Green LED
- (x1) Red LED
- (x1) 1N4001 Diode
- (x1) 22 AWG wire. I used solid core to make the wire easier to work with
- (x1) 1/4" heatshrink. I used this to help bundle the wire together
- (x1) solder
- (x1) hot glue
- (x1) double-sided tape (optional)
- (x100) $

Tools:
- (x1) pencil
- (x1) electric drill with 1/4" bit
- (x1) soldering iron
- (x1) adjustable third hand
- (x1) Arduino IDE
- (x1) hot glue gun
- (x1) mechanic gloves (optional)
- (x1) Yasutomo Wood Carving Knives Set Standard 12 Pieces
- (x1) hack saw
- (x1) self-healing cutting mat
- (x1) ruler
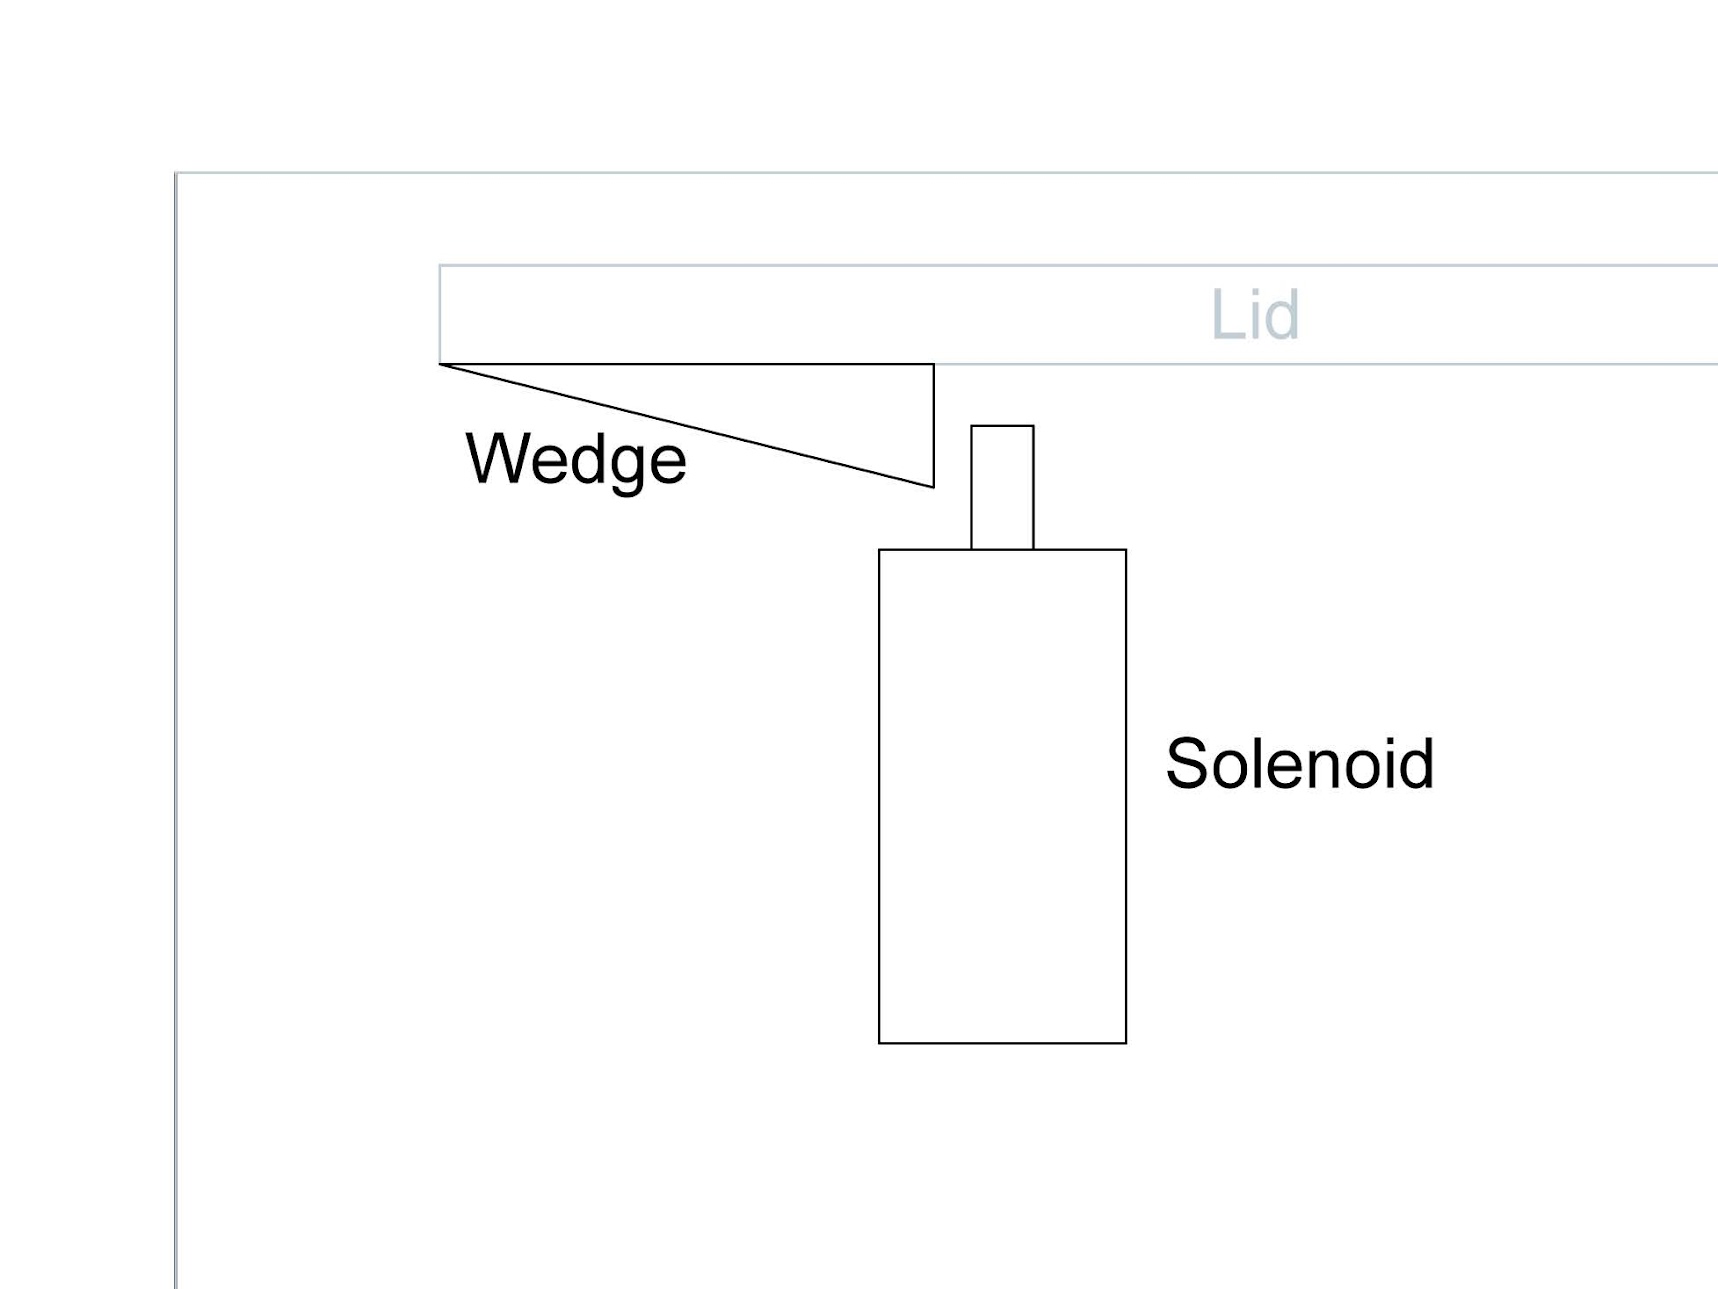
Step 2: Carve the Wedge
This will secure your lid while the solenoid is de-energized. Use the hack saw to cut a ~1"x1/2"x1/4" block of wood. Use the below picture and wood carving tools to whittle the appropriate wedge.

Step 3: Prep the Enclosure
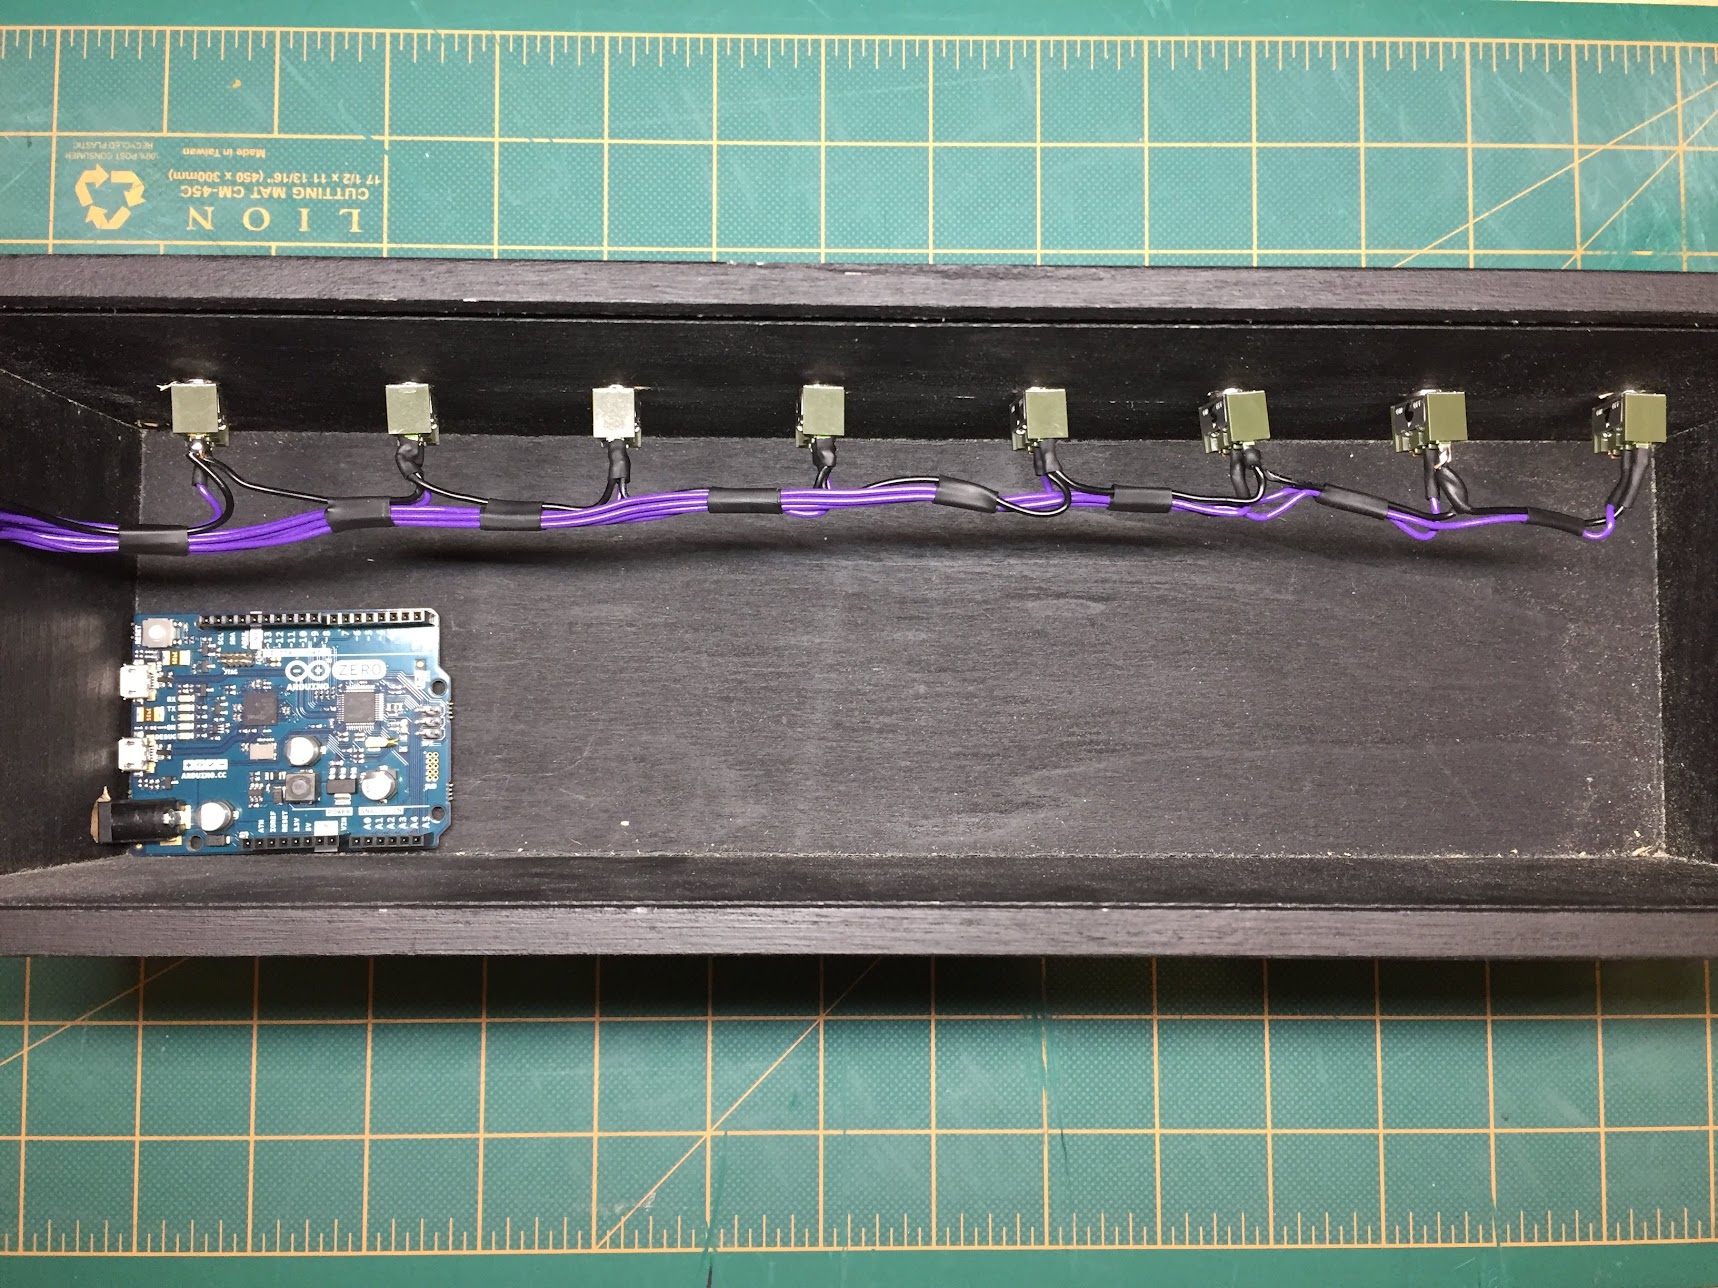
Plan where to place the Arduino, switches, and LEDs. With the lid facing you, such that the lid slides right, mark the top with a pencil for the LEDs and switches. I placed the LEDs in the upper left corner and spaced out the switches equally across the center. With the lid now facing up, mark the left side of the enclosure for the Arduino. You want the Arduino's power port accessible but not the programmable ports. Otherwise, your friend could reprogram the Arduino to unlock the box. Drill 11 holes with the 1/4" bit.


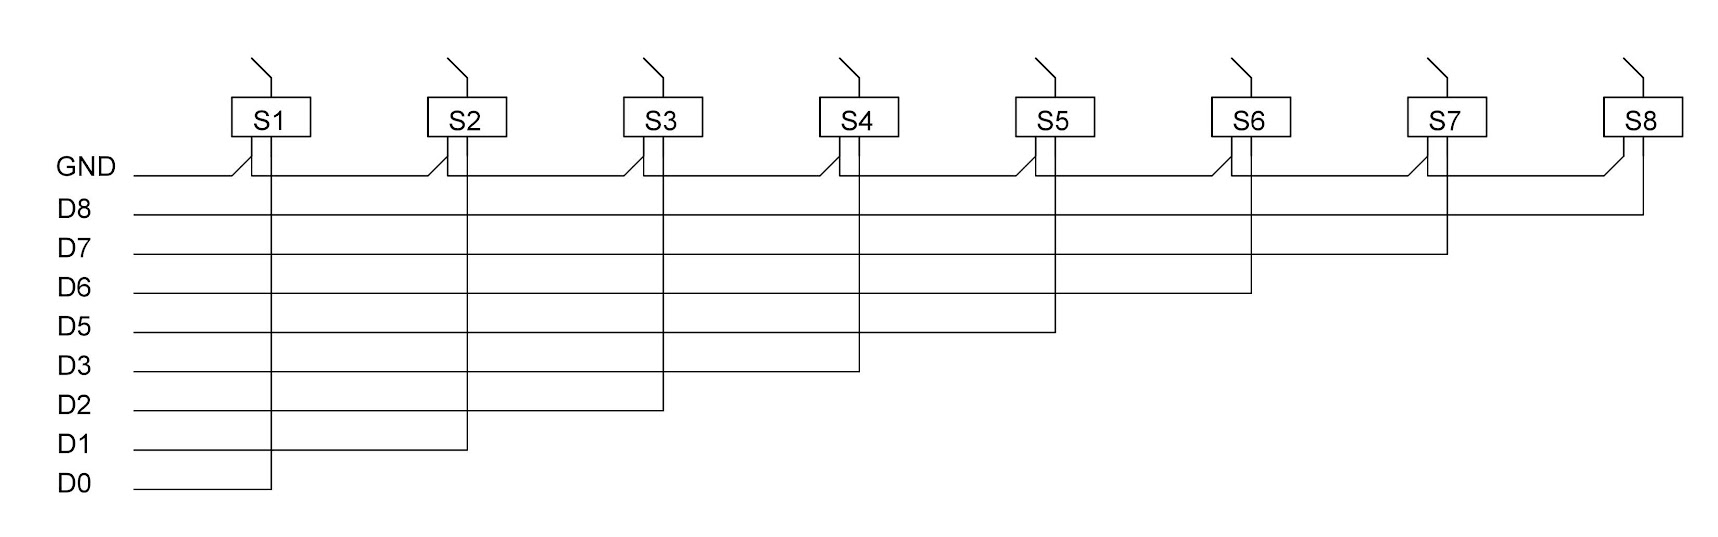
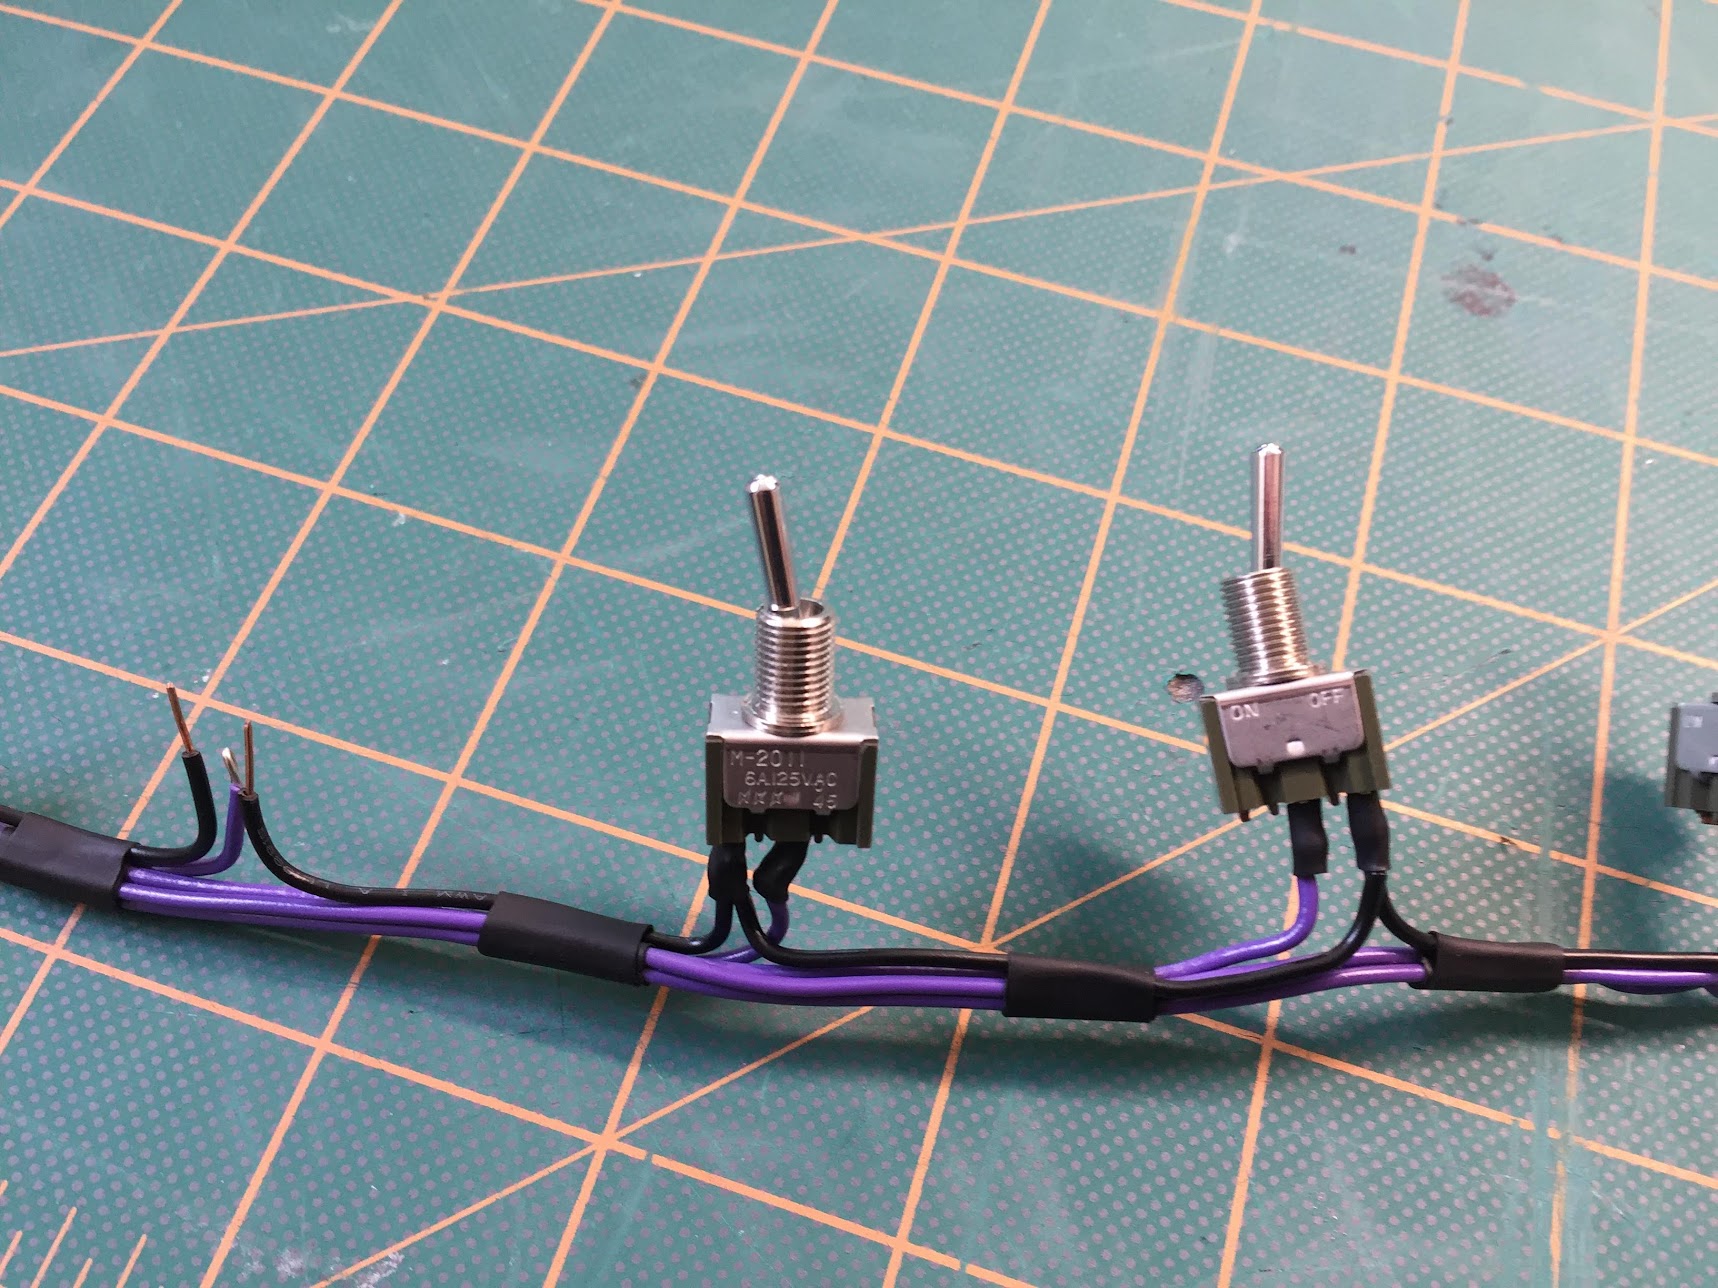
Step 4: Build Switch Bundle
Follow the below pictorial diagram to get an idea of how to wire the switch bundle. Build this outside the enclosure. Add heatshrink and then solder the switches. Remember to leave a little slack so the switches have no problem lining up with the enclosure. Install in the enclosure.
Step 5: Build LEDs
Solder the LEDs according to the below pictures. Note, the resistor is on the positive terminal. Use a third hand to hold the resistor and LED as you solder. Add heat shrink.


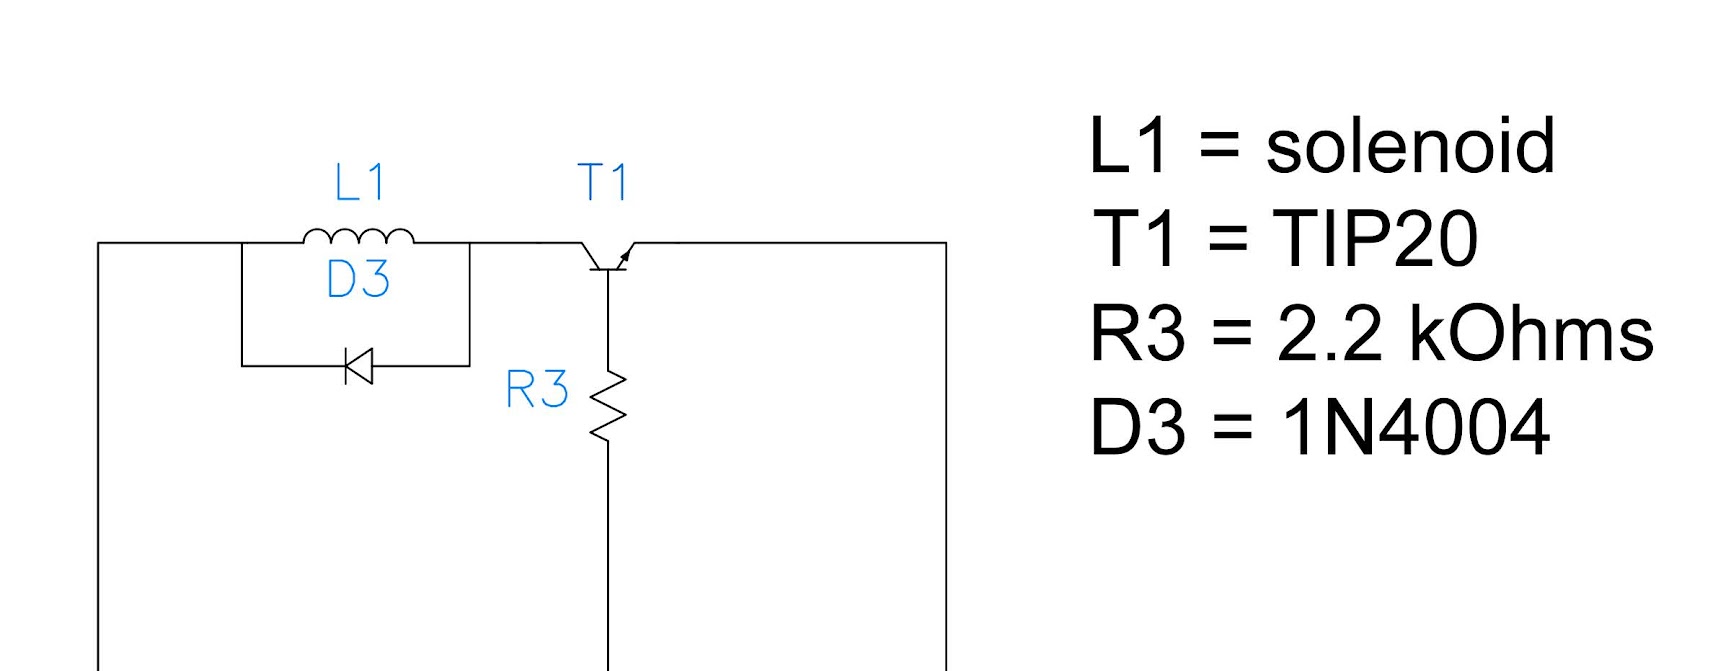
Step 6: Build Solenoid
Wire the Solenoid according to the below schematic.

Step 7: Dry Run
Copy and paste the linked code into your Arduino IDE. Edit areas marked "EDIT" to create a custom morse message and switch combination. Download to your Arduino. Connect everything according the below schematic with the Arduino, LEDs, and solenoid outside the box. Test that it runs properly.


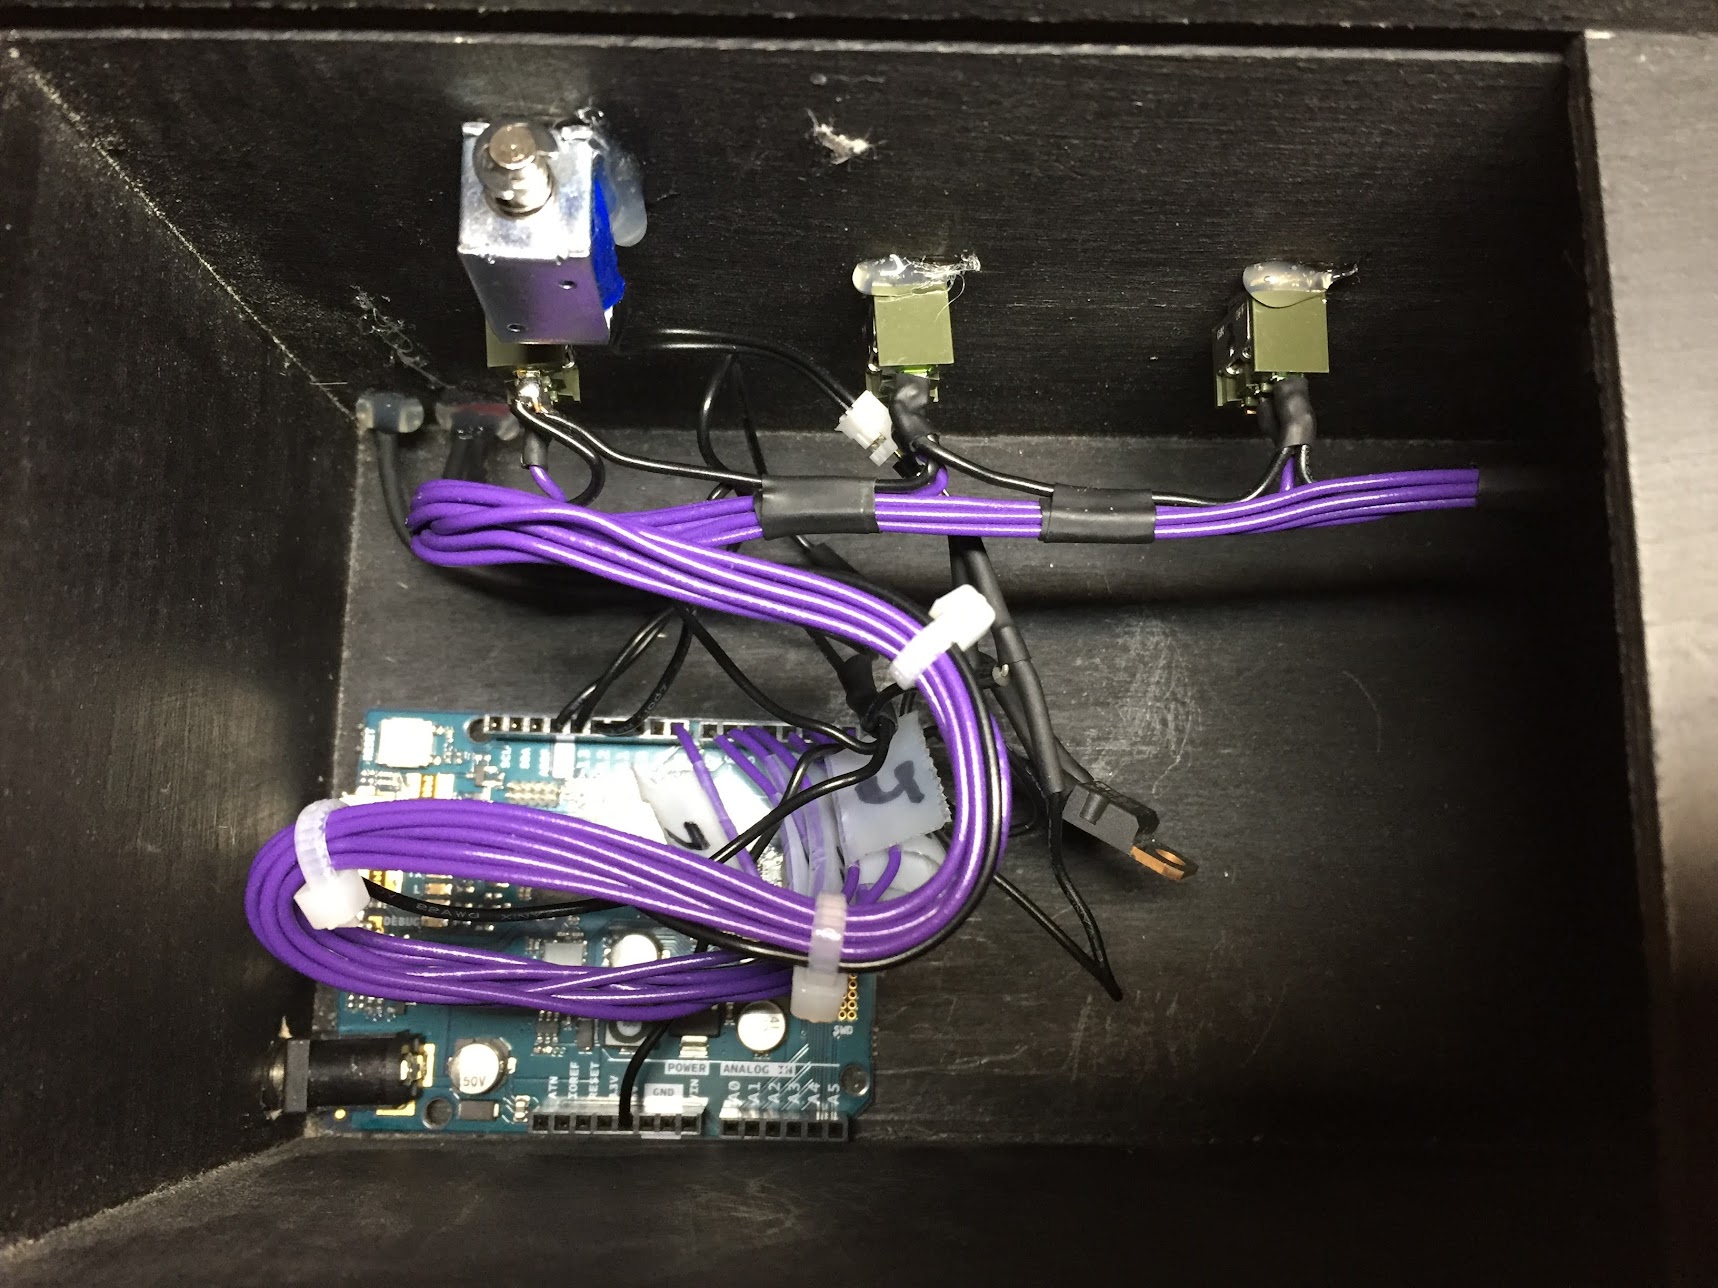
Step 8: Bring it All Together
Install the switches and hot glue in place. Install the LEDs and hot glue in place. Install the Arduino and DO NOT hot glue. What are you crazy? Just tape it down with some double-sided tape. The solenoid and wedge require I little more finesse to install correctly. Use the below pictorial diagram and pictures to better understand how to install the solenoid and wedge. Hot glue the wedge first. Use double-sided tape to test the solenoid before hot gluing. I ended up leaving the double-sided tape for a better connection with the inside wall.

Step 9: Enjoy
Place your thoughtless gift (the cash) inside, slide the lid shut, and watch your friend stress out on their birthday trying to solve the puzzle only to smash your hard work open with a hammer.